
If you want to develop technical mastery in any domain, you need to know how to quickly solve common problems. So let me show you how to fix the most common problem in HPLC: an air bubble in the pump.
An air bubble in the pump is by far the number one cause of problems in LC. If you know how to identify when you have an air bubble and how to fix it, you will be the star of your lab on more than occasion.
How to identify the symptoms of an air bubble
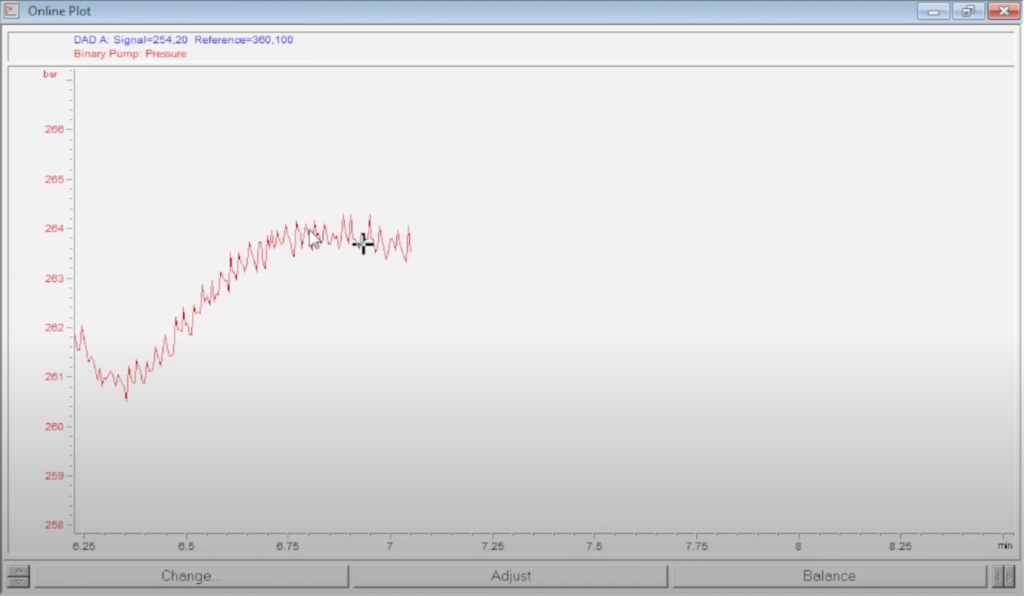
Having an air bubble in your HPLC pump results in a telltale signature in the pump pressure. I’ve created an air bubble in an HPLC in my lab at Axion Labs so you can see what it is. Look at the screen here, you can see what I’m plotting. Here in red is the pressure.
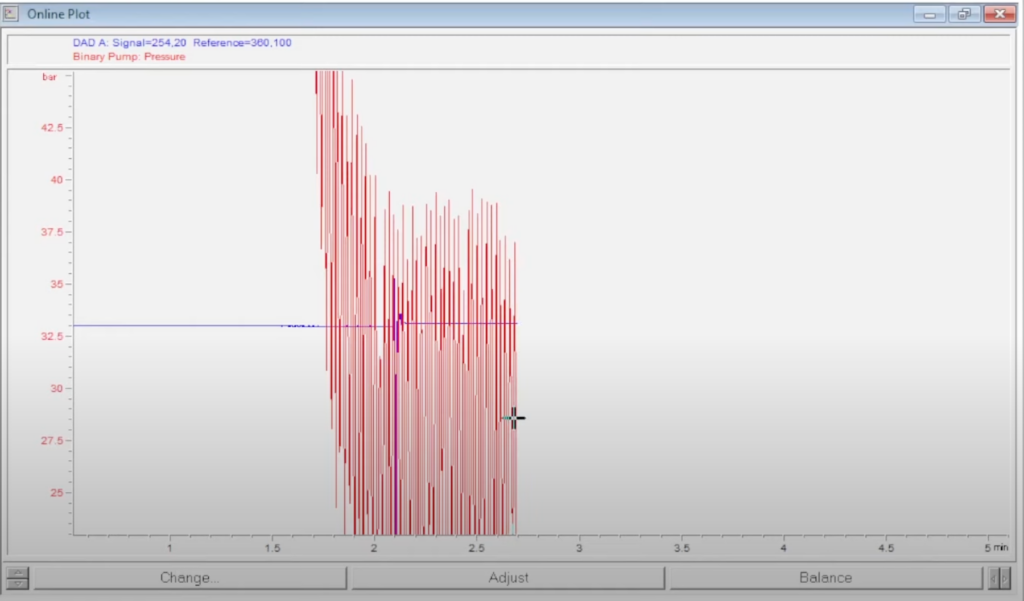
The pressure should be nearly constant. It should be pretty flat. The variation in pressure in an HPLC under normal operation is called pressure ripple. Can you see the variation? The pressure coming from an HPLC pump that is operating correctly should vary less than 2%. But, whoa! Here I’m seeing the pressure jumping from 20 to 37. So clearly, there’s something not quite right with the instrument. We have too much pressure ripple. It is supposed to be less than 2%, but this is probably 200%. That usually means – 99% of the time – that you have an air bubble in the pump. Which of course I do because I induced the air bubble for your training.
Note that the UV signal is also bouncing around.
How to eliminate air bubbles in an HPLC pump.
The good news is that it is pretty easy to fix an air bubble in the pump. The way we do it is by opening up the purge valve, and using a simple procedure.
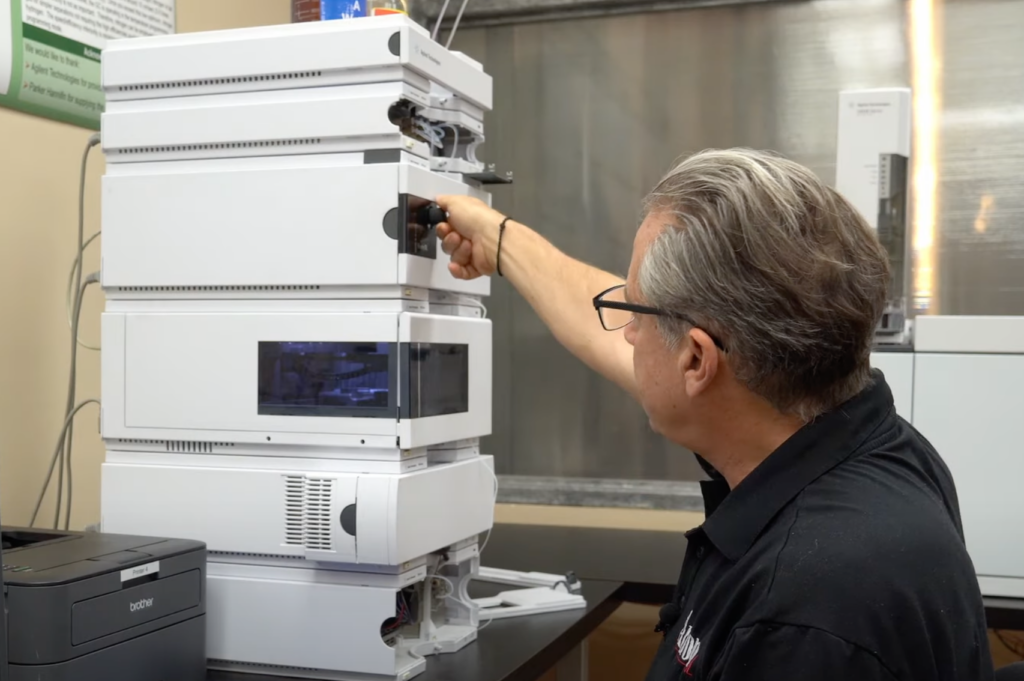
I’ll even take off the pump cover. Sometimes we could see a little bit of liquid here. We can see this air bubble that’s causing this, called cavitation, inside pump number two in my case.
So just by opening the purge valve, it’s going to allow that air bubble to exit, but more importantly, we’re going to take the flow rate up to five mL a minute. By doing that, it will flush the air bubble out.
Now my pump B, it’s running 90/10, but pump B is running at five mils a minute, and that air bubble is completely gone.
This is my own little trick. I like to start closing the needle valve. You probably see these little air bubbles coming out. The way I think of it is that just by opening the purge valve and increasing the flow rate I have eliminated about 99% of the bubble. But perhaps 1% of the air bubble remains. So I like to – without going all the way in – I like to close the purge valve very slowly, but not completely close it. And that flushes out that last little bit of air bubble.
And then, before we completely close the purge valve, make sure you set the flow rate back to your typical flow rate. For me, it’s two mL a minute. And then, when we close the valve, hopefully, what we’ll see is our pressure stability come back. So the pressure jumps way up. So now that I’ve closed the valve, you can imagine the pressure is building up to the pressure that it should be on this column.
How to check if you removed the air bubble
Before I got the air bubble in the pump, my pressure fluctuation was bouncing from 262 to 262.5, a really nice small number. And then when I got the air bubble in the pump, we saw that gigantic fluctuation. And now that I have gotten rid of the air bubble, we should see this come back down to our tiny little fluctuation that we were seeing before. Once the pressure stabilizes out, we can take a little closer look at the pressure ripple.
So when I look at pressure ripple, I just look at the plus or minus, and I know this baseline is still climbing, but even here you can see that it’s going as high as 262.9, as low as 262.5.
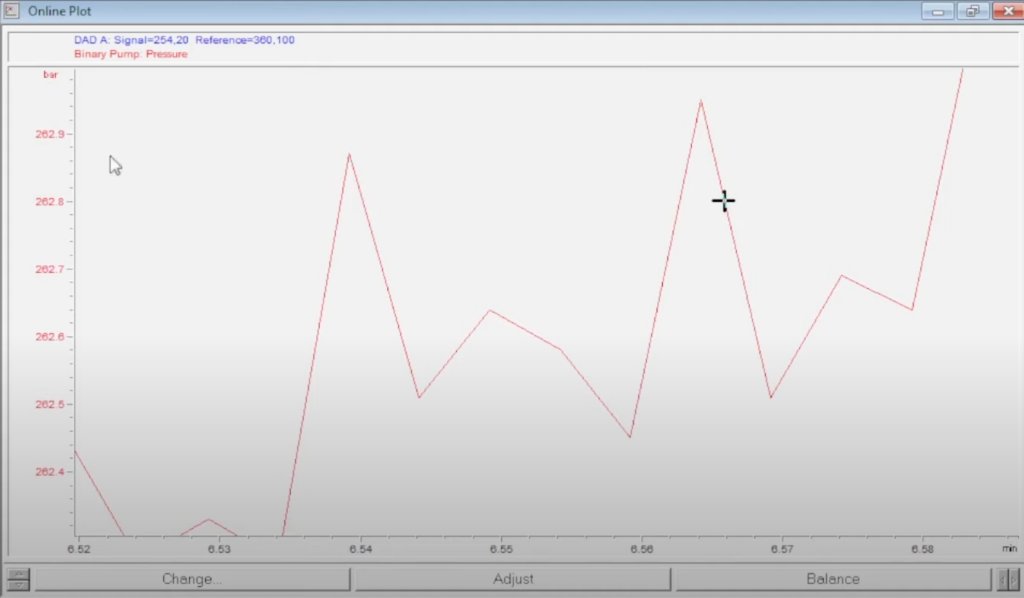
So if you think about that, that’s going to be less than a 0.25% ripple. That is in spec, and actually quite a bit less than the 2% maximum pressure ripple. If, after performing the purge you notice that your pressure ripple is in spec then you have fixed your problem.
Software Tips
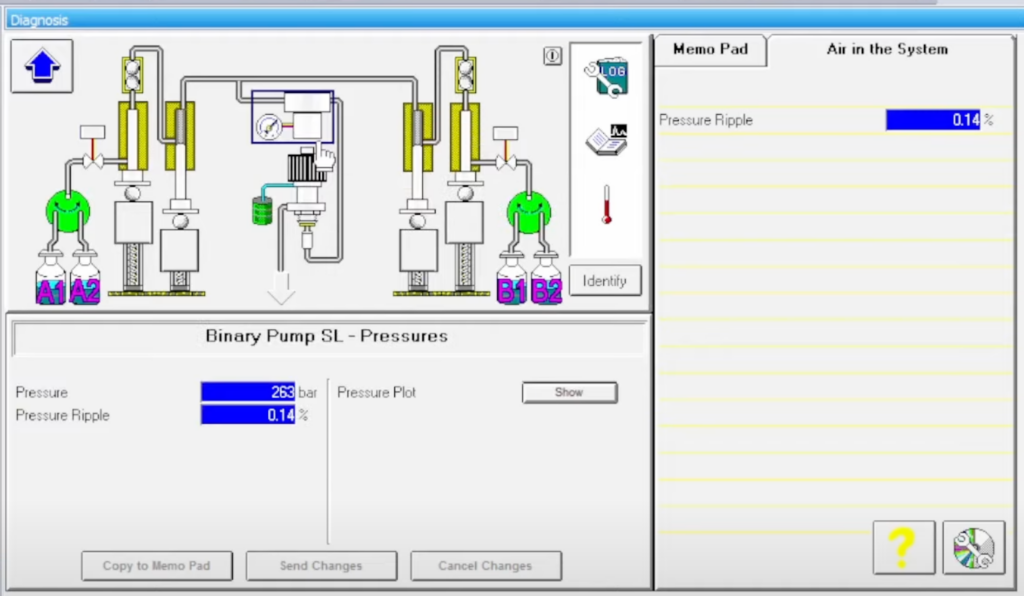
In some software there is an easy way to find the pressure ripple.
In the video “HPLC Software Tips: Diagnostic Tools,” I showed you a little tool in the software. If we go to the diagnosis screen, we can actually see what that pressure ripple is simply by clicking on the pump and then clicking on the pressure valve itself. Sure enough, our pressure ripple is down to 0.14%, a beautiful number. Remember, it’s supposed to be less than two percent.
So that is how you fix an air bubble in the pump. It is by far the number one cause of problems in HPLC. Therefore knowing how to identify it and fix it is essential to developing technical mastery in HPLC.
The good news is that there is a simple solution: open the purge valve, turn the flow rate to five mLs a minute, let it sit there for 10 to 20 seconds, and then back to normal flow rate, close the purge valve.
That takes care of the number one problem you’ll run into in HPLC. So hopefully, that helps. If you have suggestions about other videos on other maintenance topics you’d love to see, let me know. I’m happy to help you develop technical mastery in chromatography.